Explore the schema
Learn how to browse and understand the schema within Apollo Explorer
Think of GraphQL like a pick-and-mix menu. The 'schema' is the menu that lists everything you can ask for.
1. Browse the Schema
- Select API Reference in the top navigation bar.
- In the left navigation menu, you’ll find these schema elements:
- Queries – Operations that retrieve data from the API.
- Mutations – Operations that modify data or perform actions.
- Types - Includes Input, Enum, Interface, Union, Scalar, and Object types that define the structure and behaviour of your data.
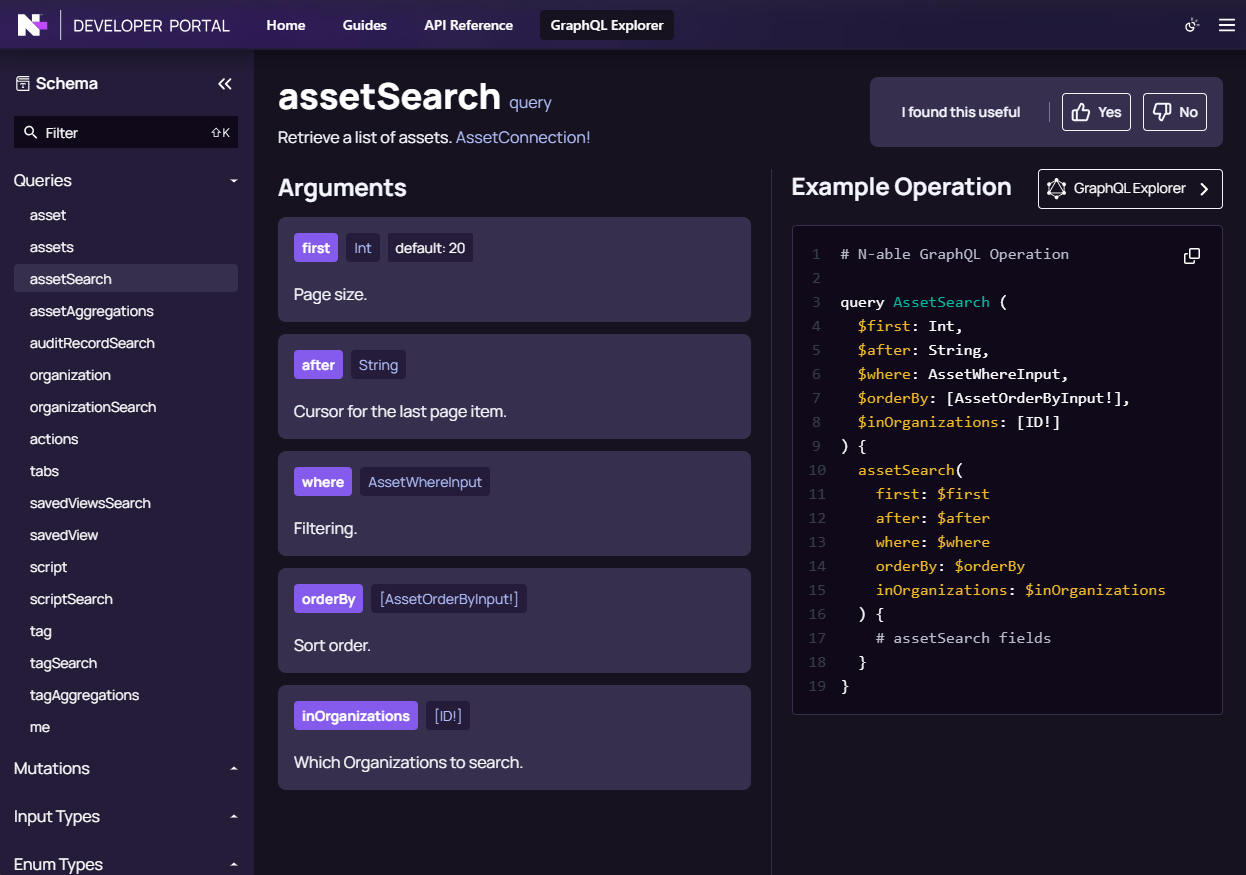
Use the Filter option to find specific schema elements and select an item to see what fields are available.
- Select a Query or Mutation to view its details and an example operation - a request that defines the data to fetch or action to perform.
- Choose the GraphQL Explorer button to open the operation in a new Explorer tab.
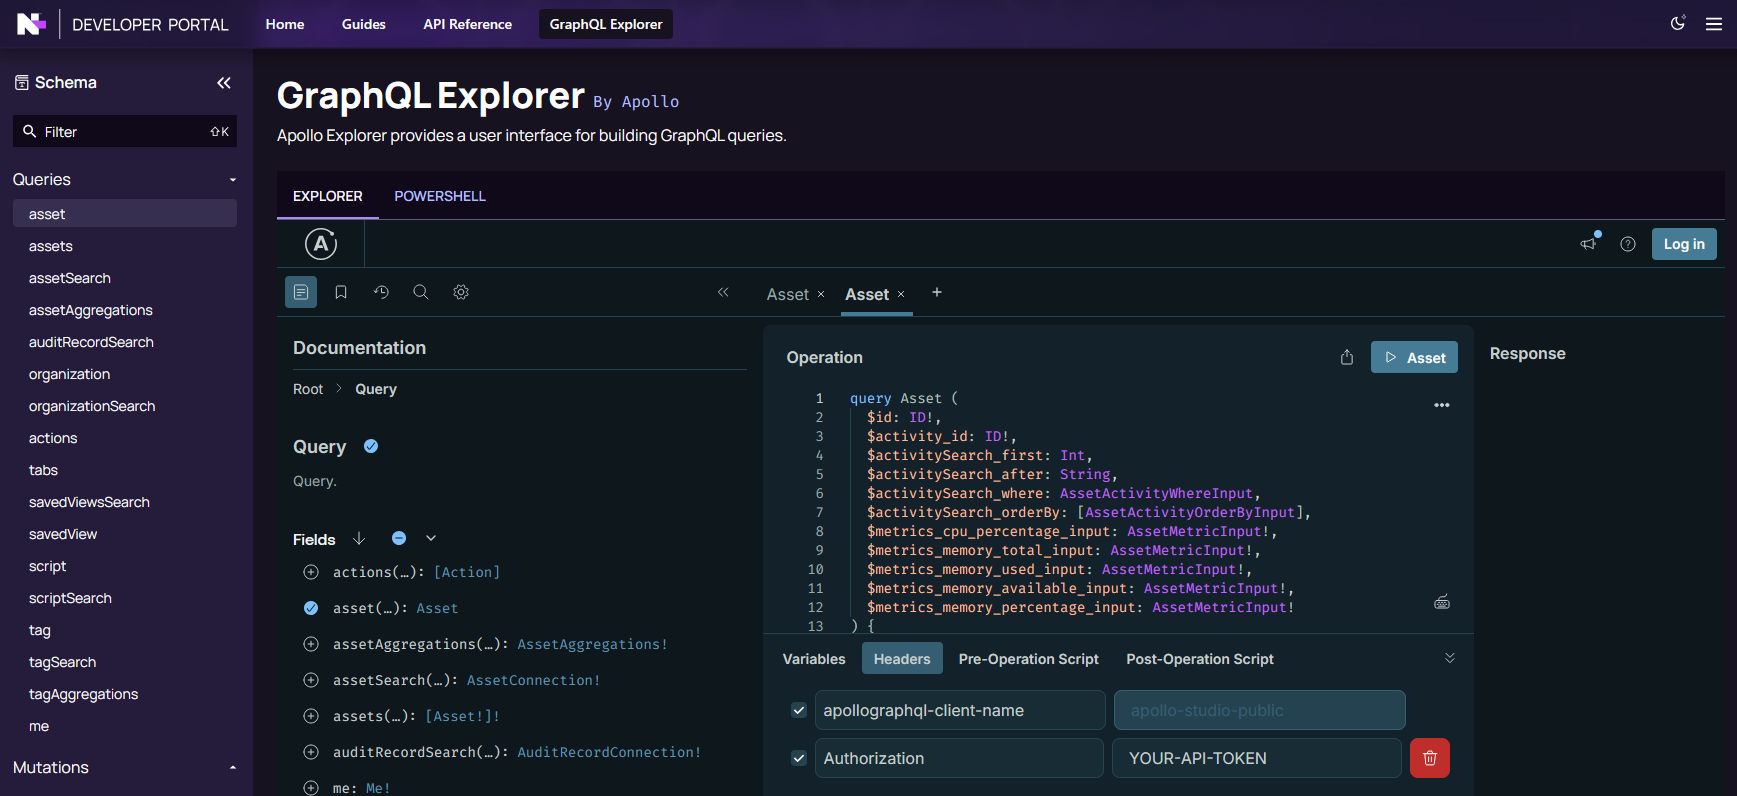
- When in GraphQL Explorer, the Schema is still displayed in the left-side navigation.
2. GraphQL Explorer
GraphQL Explorer is our interactive tool for running and testing GraphQL queries using an embedded version of Apollo Explorer.
- Select GraphQL Explorer link or button in the N-able GraphQL API sections to launch it.
- To open it in a separate tab, right-select the link or button and choose Open link in new tab (or equivalent).
The A button labelled Go to graph index opens the Apollo Graph Index, central reference for our GraphQL schema, in a new tab. Use it to view the full schema and related documentation outside the embedded Explorer.
Select Expand or Collapse to show or hide the Documentation and Settings expanded view.
Associate with Apollo Studio
Associating an Apollo Studio instance with N-able’s GraphQL Explorer gives you access to advanced settings.
To associate an Apollo Studio instance with N-able’s GraphQL Explorer:
- Select the Log in button in GraphQL Explorer.
- Sign in to Apollo Studio or create a new account when prompted.
- After validating your credentials, https://api.n-able.com will request access to your Studio account for the graph N-able@public.
- Select Authorize to approve.
3. Add your API token
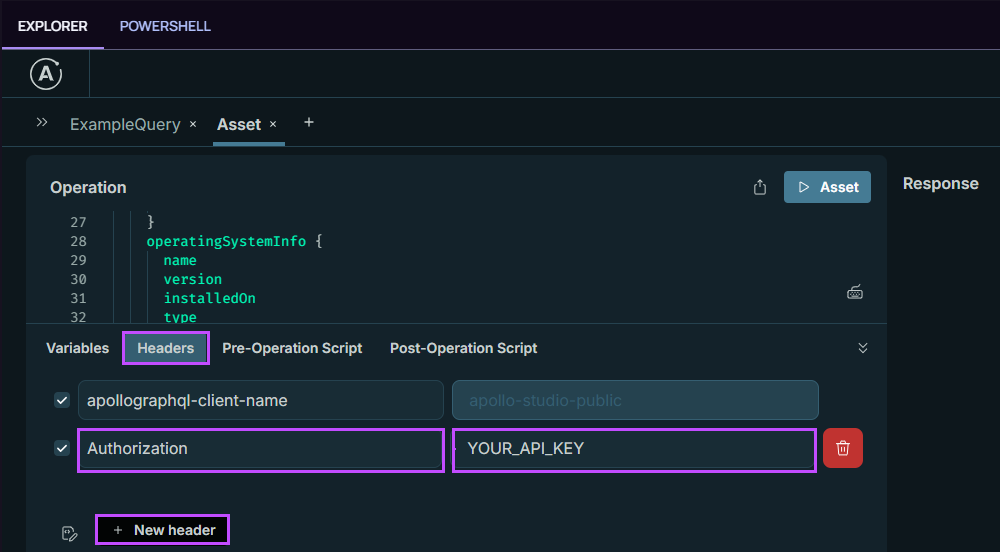
Even if you’re signed in, the GraphQL Explorer still needs your API token to access product data. If you don’t have an API token, view the Getting Your Tokens page).
To add your token in Apollo Explorer:
- In GraphQL Explorer, go to Headers in the lower panel.
- Select New header.
- Click in the type field and choose Authorization from the list.
- Enter your API token in the value field.
What to expect
- If you have access to a product and data exists, you will see results.
- If you do not have access, you may see empty results (or null fields). That is normal.
Updated 21 days ago